
 I've decided to whip out my Perfect Pearls and show you a few techniques I like. I did these with my girls watching, they were really diggin' these techniques and want to try some themselves. :)
There are Perfect Pearls and there are Pearl Ex. I have both. The difference between the two is the Perfect Pearls already have the binder mixed in them so they will react/stick to water and ink. The Pearl Ex needs to be mixed with a binder. I mix mine with Gum Arabic (four parts Pearl Ex to one part binder).

Technique #1 - perfect pearls and distress ink:
 #1. Ink up your tag (paper) with Distress Ink. It need to be distress ink because the ink reacts to water, you will not get the extra ring of colour using a different type of ink.
 #2. Spray some water on your Craft sheet and scoop some perfect pearls onto your brush and mix. Let the perfect pearl water mixture drip onto your inked paper/tag.
#3. Dry it with a heat gun if you are impatient like me :)
#4. I also like to use up the extra perfect pearls by soaking the left overs randomly onto another tag.
#5. End results.
Technique #2 - masking:
 #1. Apply mask and cover entire tag/paper with clear embossing or versamark ink.
#2. Use the large brush your perfect pearls came with and pick up the perfect pearls with it. Brush on areas you want that colour.
#3. You can use multiple colours.
#4. Peel off your mask.
Technique #3 - painting:
Technique #3 - painting:
 #1. Supplies... stamp, embossing powder, clear embossing ink, heat gun, perfect pearls, water, brush and paper.
#2. Stamp and heat emboss your image.
#3. Mix your perfect pearls with water and paint your image. The less water that is used the more vibrant your colour. If you used to much water just let it dry and paint it again. The raised embossed edges of your image help to keep the perfect pearls from becoming a mixed up mess on your image, so you don't have to wait for each section to dry.
#4. End result.
Here are some bookmarks I made for my girls using this technique...

Technique #4 - Heat Embossing:
 #1. Mix perfect pearls with some clear embossing powder. The more perfect pearls you mix the less raised your image will be. The image will be more shimmery though. Stamp your image with clear embossing ink and sprinkle the mixture over top. Shake the excess off. Don't worry about your Perfect Pearls shimmering all over the paper for now. Your image should look like #2. Heat emboss with heat gun and use a brush to brush off the perfect pearls that are all over your paper, final result should be something like #3.
Technique #5 - dumping :) :

This is one of those techniques you acquire when you think a project just needs a little shimmery mess. Don't worry about being perfect with the steps, this is one that does not require perfection.
 You can see more of this album here. Just scroll down.
It's sort of hard to tell in the photos but the end results are always shimmery pretty additions to your layouts etc.
Meet you back here on Friday :)
 #1. Mix perfect pearls with some clear embossing powder. The more perfect pearls you mix the less raised your image will be. The image will be more shimmery though. Stamp your image with clear embossing ink and sprinkle the mixture over top. Shake the excess off. Don't worry about your Perfect Pearls shimmering all over the paper for now. Your image should look like #2. Heat emboss with heat gun and use a brush to brush off the perfect pearls that are all over your paper, final result should be something like #3.
Technique #5 - dumping :) :

This is one of those techniques you acquire when you think a project just needs a little shimmery mess. Don't worry about being perfect with the steps, this is one that does not require perfection.
#1. Spray some water on your project about where you want the shimmer. Dump a little perfect pearls on the sprayed area.
#2. Spray more water on top until it looks like most of the powder is wet. Dry with heat gun.
#3. End result.
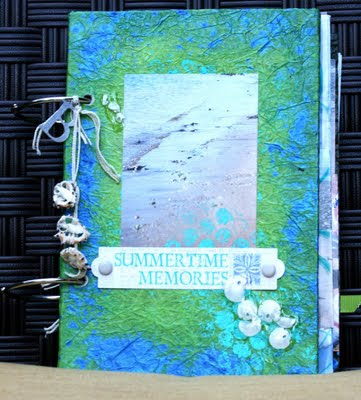
Here is a project that I used this technique with. I did it on every page.
Here is a project that I used this technique with. I did it on every page.
 You can see more of this album here. Just scroll down.
It's sort of hard to tell in the photos but the end results are always shimmery pretty additions to your layouts etc.
Have fun with your Perfect Pearls, hope to see your projects using some of these techniques.
Meet you back here on Friday :)
xo
Tania


3 comments:
Awsome - I've always wondered how to use those perfect pearls I bought a long time ago - thanks :)))
Really love the tut! I've got both, and really never bothered to find out how to use them - so this was really helpful, thank you.
brilliant post, thank you, i shall forever be a lurking fan :o) Suzee x
Post a Comment