Friday, January 29, 2010

challenge 161

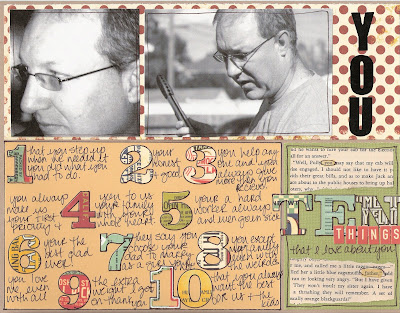
Oh boy, this is a fun one. I think that these non-sketch challenges really get everyone's juices flowin' and stirs up something creative & magical... This week, our challenge is to

use dictionary/phone book/music paper in our layouts

In other words, take advantage of abundant non-scrapbooking paper that is in everyones houses!!! Hooray for up-cycling :) Get in on the action! find out how here.

This is Stacy's last week with us so be sure to check out her fab layout at the bottom. Not to mention all the incredible layouts between here and there! C'mon everyone...ya ready?

Tuesday, January 26, 2010

Tuesday Tutorials - Perfect Pearls

I've decided to whip out my Perfect Pearls and show you a few techniques I like. I did these with my girls watching, they were really diggin' these techniques and want to try some themselves. :)


There are Perfect Pearls and there are Pearl Ex. I have both. The difference between the two is the Perfect Pearls already have the binder mixed in them so they will react/stick to water and ink. The Pearl Ex needs to be mixed with a binder. I mix mine with Gum Arabic (four parts Pearl Ex to one part binder).


Technique #1 - perfect pearls and distress ink:


#1. Ink up your tag (paper) with Distress Ink. It need to be distress ink because the ink reacts to water, you will not get the extra ring of colour using a different type of ink.


#2. Spray some water on your Craft sheet and scoop some perfect pearls onto your brush and mix. Let the perfect pearl water mixture drip onto your inked paper/tag.


#3. Dry it with a heat gun if you are impatient like me :)


#4. I also like to use up the extra perfect pearls by soaking the left overs randomly onto another tag.


#5. End results.


Technique #2 - masking:

#1. Apply mask and cover entire tag/paper with clear embossing or versamark ink.


#2. Use the large brush your perfect pearls came with and pick up the perfect pearls with it. Brush on areas you want that colour.


#3. You can use multiple colours.


#4. Peel off your mask.


Technique #3 - painting:


#1. Supplies... stamp, embossing powder, clear embossing ink, heat gun, perfect pearls, water, brush and paper.


#2. Stamp and heat emboss your image.


#3. Mix your perfect pearls with water and paint your image. The less water that is used the more vibrant your colour. If you used to much water just let it dry and paint it again. The raised embossed edges of your image help to keep the perfect pearls from becoming a mixed up mess on your image, so you don't have to wait for each section to dry.


#4. End result.


Here are some bookmarks I made for my girls using this technique...

Technique #4 - Heat Embossing:

#1. Mix perfect pearls with some clear embossing powder. The more perfect pearls you mix the less raised your image will be. The image will be more shimmery though. Stamp your image with clear embossing ink and sprinkle the mixture over top. Shake the excess off. Don't worry about your Perfect Pearls shimmering all over the paper for now. Your image should look like #2. Heat emboss with heat gun and use a brush to brush off the perfect pearls that are all over your paper, final result should be something like #3.

Technique #5 - dumping :) :


This is one of those techniques you acquire when you think a project just needs a little shimmery mess. Don't worry about being perfect with the steps, this is one that does not require perfection.


#1. Spray some water on your project about where you want the shimmer. Dump a little perfect pearls on the sprayed area.


#2. Spray more water on top until it looks like most of the powder is wet. Dry with heat gun.


#3. End result.

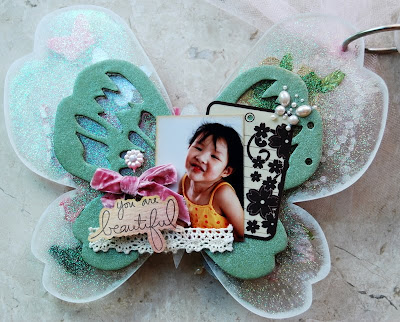
Here is a project that I used this technique with. I did it on every page.

You can see more of this album here. Just scroll down.

It's sort of hard to tell in the photos but the end results are always shimmery pretty additions to your layouts etc.

Have fun with your Perfect Pearls, hope to see your projects using some of these techniques.

Meet you back here on Friday :)
xo
Tania


Friday, January 22, 2010

Challenge 160

One hundred and sixty weeks!! That is amazing. :) This week we bring you another sketch. Here is the link to how the challenges work if you`d like to play along. Check out our interview with our Guest Designer here while you are at it :).


Thursday, January 21, 2010

Tuesday Tutorial (on a Thursday?!) - Stamp Kissing


So yeah, we're doing this week's Tuesday Tutorial on a Thursday. It's a super awesome, simple technique that's easy to do and if you have a favorite patterned stamp and a great broad, solid stamp, you're halfway there!!

To rock this technique gather up the following::
-patterned stamps (the busier, the better)
-broad stamp with wide space to transfer the patterned stamp onto
-ink
-cardstock
-exacto blade & craft mat


I decided to give my under-used woodgrain stamp & some forgotten alpha stamps a little play for this demo. I made sure I had a light colored cardstock on hand & rich teal colored ink. Start by turning over your patterned stamp and ink it with the rubber face-up. Doing it this way rather than pressing the stamp into the ink allows you to see which spots need more ink without fussing with handling an inked stamp.

With your ink in one hand and stamp laying rubber side up, ink up the rubber surface. Set the ink aside. Work fairly quickly so the ink doesn't dry on you!

Grab your broad stamp (in this instance, I am using my alpha stamp). Carefully press straight down onto the inked surface of the patterned stamp, taking care to not let the alpha stamp slide. Lift the stamp up and stamp onto your paper. With your craft knife, begin trimming around the letters, starting with the holes in the centers of each letter. It's easier to do this now rather than when the outside edges are already cut (you risk ripping the letters otherwise) Once they're cut out, just use them just like you would any other alpha!


Ta Daa!


Sunday, January 17, 2010

Time to choose your favorite!

You know, I love all of you. You amazing artists who willingly share your often very personal layouts in our Flickr Group. Your passion & skill amaze me and your dedication to preserving your families' memories is heartwarming. I just thought I'd tell you all how fab I think you all are.

In the month of December, things are usually pretty dang quiet in the flickr group. We totally understand that you have families to spend time with and most importantly, to make memories with. Yay for memories :) There were, however, a few bad-ass hardcore scrappers who managed to upload their layouts to the Flickr Group for December's challenges. We decided that these three would make for a great race in choosing our favorite layout from the last month of 2009!! Please remember that you are encouraged to share this post info with everyone! We want you tellin' your Auntie in California and your Granny in New York (and everyone in between!). Anyone can cast a vote and you will have 2 weeks to scrounge up all the votes you can!

The poll can be located at the top right hand side of the blog. You have until 12pm PST on Jan 31 to cast your votes!!


Here they are in no particular order.

Friday, January 15, 2010

Challenge 159

Oh geez, I've been into organizing around the house (mostly the studio) that I almost forgot about the challenges. I get so into what I am doing I forget about the world around me, lol. Maybe my spring cleaning will be done before spring!! :D

This week we challenge you to
use a lot of tags.
All the info to play along is here. Also, check out our Guest Designer Stacy, and all the talent she brings.


Thursday, January 14, 2010

Email malfunction

Hi gang, I'm trying to get caught up around the studio and have to ship out a few prize packages :) I need Petra Coolen to re-send me email information so I can get your prize out to you. Please email me at info {at} lotuspaperie {dot} com. Sorry for the delay. I blame Christmas! LOL

Tuesday, January 12, 2010

Tuesday Tutorials - Heat Embossing on Acrylic

Hi everyone! Welcome to another Tuesday on the Lotus Paperie blog and this week’s Tuesday Tutorial! With the new year well underway by now and most of the kids back at school, even us scrapping moms will be able to have hopefully a little bit more time on our hands to get just that little bit more creative with our scrap supplies, and today I’m going to show you how to heat emboss on acrylic.
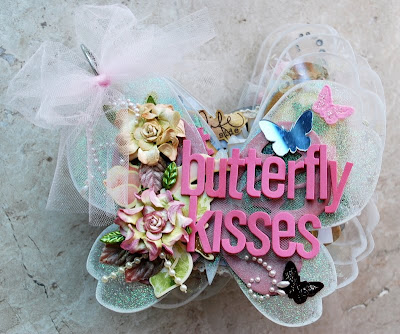
Many of the scrapbook suppliers have over the past year released clear acrylic albums which are all the rage nowadays. However, due to their see-through nature, embellishing them requires a somewhat careful placement of paper, photos and embellishments, and after a while, there are only so many ways of doing this. Heat embossing the acrylic pages with various coloured embossing powders creates a different effect on the clear acrylic background and can give a different look to the album altogether. How is this done?
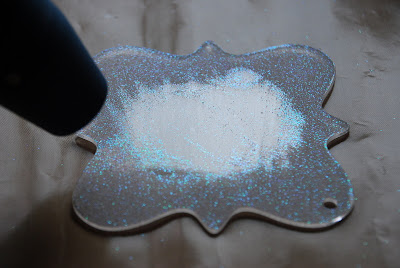
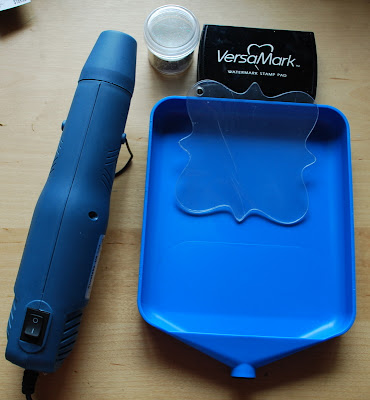
First, gather your materials. You will need the clear acrylic albums page , your embossing ink (I used Versamark), embossing powder (I used clear holographic), a heat gun, and, if you have one, a tray to catch the embossing powder.
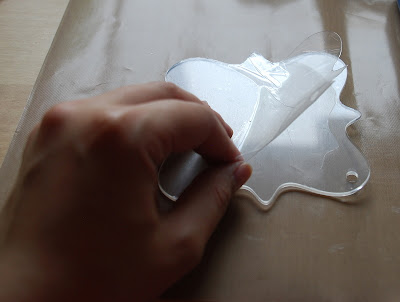
Lay the acrylic page on a craft sheet to protect your worktable. Gently peel the protective film off one side of the acrylic sheet only, exposing the surface to be embossed.
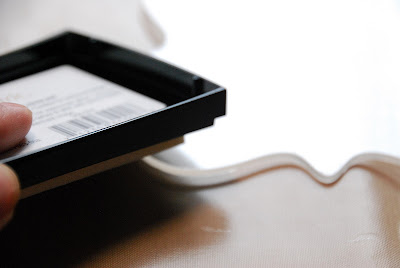
Using the Versamark/embossing ink, ink the exposed surface of the acrylic sheet. How you ink it depends on how you want the final product to look. If you intend to cover the entire page, then sweep your ink pad across the surface. It does not have to be even, but do avoid leaving patches, unless a patchy effect is what you are going for. In my case, my intention was to emboss around the sides of the page, leaving the center clear. I therefore swiped my inkpad face down over the page , starting from about 1” from the edge and covering evenly.
When you’ve completed inking the page, place it face up in the tray. (If you don’t have one, just use a sheet of rough paper to catch the extra embossing powder.) Sprinkle the embossing powder over the inked portions of your page.
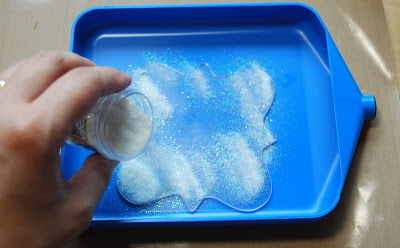
When the entire page is covered, gently lift it off the tray and place it on your craft sheet. (Again, if you don’t have a tray, just lift the sheet off your working sheet of paper and place it on another clean sheet of paper.) Using your heat gun, apply heat to the embossing powder until it melts and adheres to the acrylic surface. Depending on the size and thickness of your acrylic sheet, some acrylic sheets may soften and bend slightly but do not be alarmed, place them flat to cool and you will find that they do revert back to the original after cooling. Do avoid holding the heat gun in place over any one spot for too long as that may cause the acrylic to over soften. Do watch your embossing powder and once you see signs of it beginning to melt, move the heat gun to another spot, working in this manner until all the powder has melted.
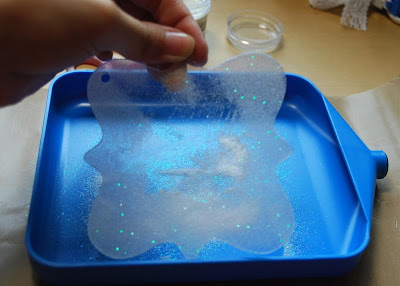
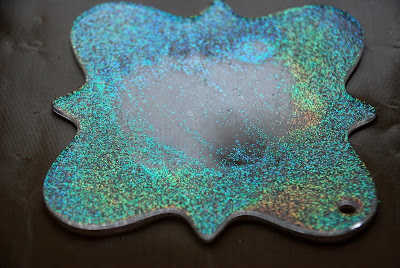
And voila! You have your finished product, an acrylic sheet embossed with the embossing powder of your choice. Peel off the protective film of the other side of the sheet and you will have one textured side and one glossy side, with both showing the glitter/shine of the embossing powder you used. Do note that you can even choose to stamp images using your clear/rubber stamps, and for the more ambitious, even try to achieve a stained glass effect with different coloured embossing powders. As can be seen from the finished sheet which I’ve held up to the light, it truly has a lovely translucent textured effect which will make your acrylic album very unique indeed.
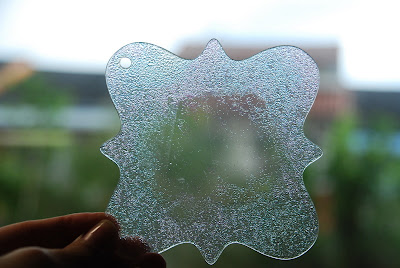
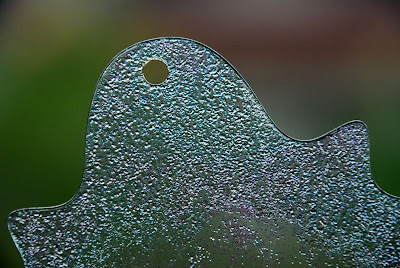
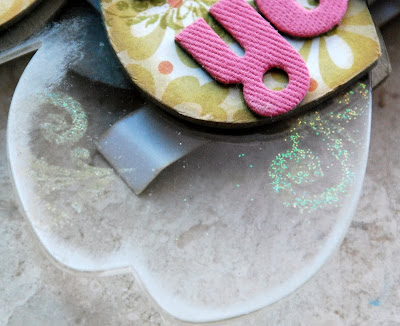
Below are a couple of examples showing the cover page (both sides) of an acrylic album which I covered with embossing powder and heated, as well as a page where I stamped swirl images and heat embossed them, and defined them with Perfect Pearls.
And so that’s it from me today, this is Carol, signing off. Hope you have enjoyed this week’s tutorial, and I wanna see all your works posted in our Flickr page! Have a good rest of the week, and do remember to tune in again on Friday for our challenge of the week!
Related Posts with Thumbnails