

Welcome to our first of many amazing, inspiring tutorials! Join us every Tuesday for a look at new (or maybe just forgotten) tricks & techniques! We'll share things that are perfect for your layouts and your home! In honor of all things crafty, our tutorials will show you just how to make some of the cool goodies our crafty little brains come up with...things from paper crafts to fabric based treasures. We hope that the how-to's get your mojo movin' and of course, we want to see what you do with this amazing know-how! So without further ado, let's get down to it.
This week's tutorial is a really simple one. In fact, this is one of the very first tricks I learned when I was brand new to scrapbooking...it's one of those "oldies but goodies" ones that I go to over and over.

HANDMADE PHOTO CORNERS
Materials::
- printed paper
- bone folder
- scissors
- adhesive
- paper trimmer
Here's the scoop. Cut out as many squares as you want corners.
I prefer to use either 1 1/2" or 2" squares.
I prefer to use either 1 1/2" or 2" squares.

Fold each one diagonally, tip to tip.
Unfold and fold the other side, tip to tip.

Unfold and fold the other side, tip to tip.

Once you've folded all squares, you should have an "X" folded
into each of your paper squares.
Making a note of which quarter of the squares
you want to be the 'front' of the photo sqare, you'll cut out the quarter opposite.
into each of your paper squares.
Making a note of which quarter of the squares
you want to be the 'front' of the photo sqare, you'll cut out the quarter opposite.

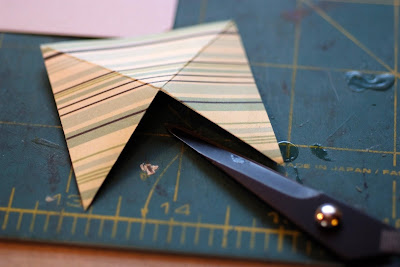
Now that they're all cut (there should be a triangle missing out of each square),
you'll grab your glue pen or another adhesive that lets you work in small spaces.
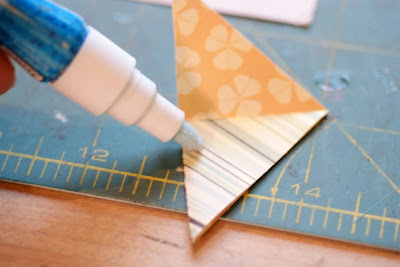
Fold one of the triangle flaps to the inside.
Apply adhesive and fold the other flap overtop and adhere.
you'll grab your glue pen or another adhesive that lets you work in small spaces.
Fold one of the triangle flaps to the inside.
Apply adhesive and fold the other flap overtop and adhere.

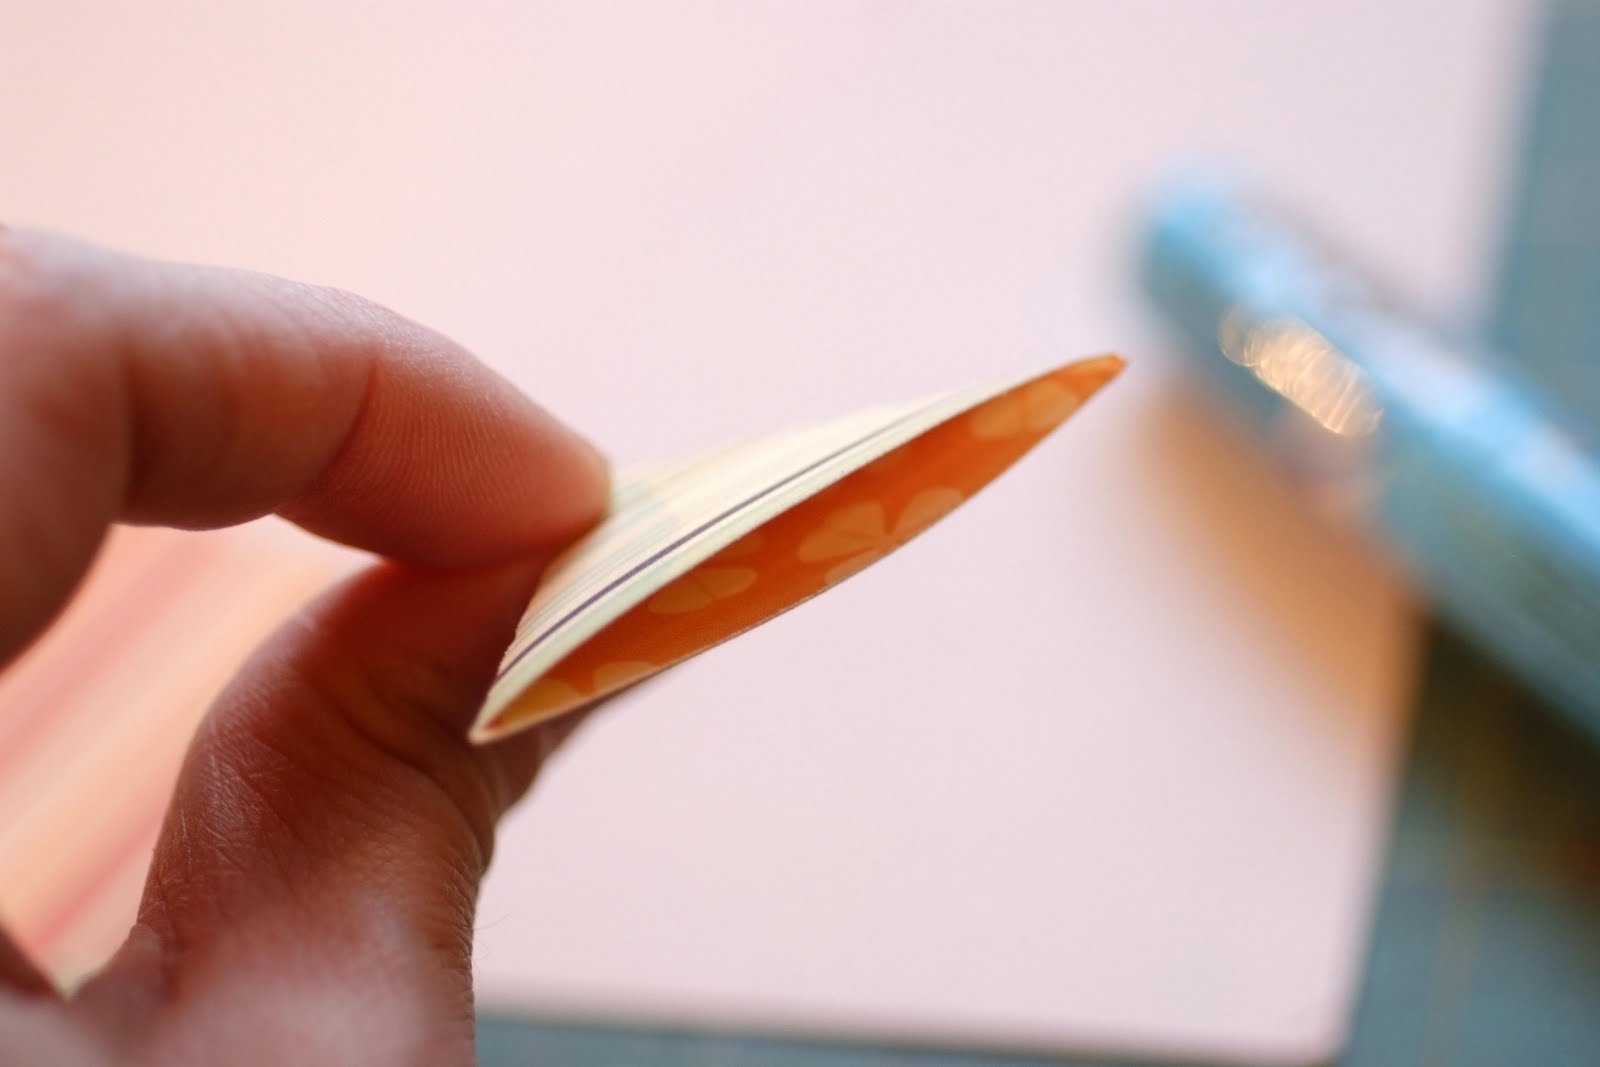
You should have a pocket left over and
this is where your photo will be tucked into.
this is where your photo will be tucked into.
 Now, before you go sticking these corners onto your page all willy-nilly, here's a tip:: tuck them all onto the photo before you apply adhesive. Once they're all in place on the photo, glue the back and ensure that they're all on straight. When you're happy with the placement of the corners, now you can go ahead and stick everything down to your page.
I love this technique, it allows me to use photo corners that coordinate perfectly with my layout no matter how unusual the colors/prints being used. I hope you enjoyed this quick tutorial. Please share links to your layouts featuring this technique! Thanks for joining me and we'll see ya back here on Friday for the next challenge!


2 comments:
Didn´t know they were that easy to make!!
Thanks for the tutorial.
this tecnique is also new to me! thanks for the tip!!!
Post a Comment